If you have forgotten your administrator password for Windows, you can use a Ubuntu Linux live CD or live USB to reset the password. This tutorial will show you how to do that, step by step.
There are many ways to get Ubuntu Linux. You can find more details about that here.
If you run into any problems or have any questions, the folks at the Ubuntu Forums are very helpful and friendly.
I will not be answering any support questions posted as comments here.

After Ubuntu boots up, you’ll be asked if you want to try Ubuntu or install it. You definitely want to just try it at this point.
This does assume that you have a working internet connection (wired preferred, but wireless can work, too). If, for some reason, your internet connection isn’t working on the computer you want to reset the password for, you can also download the chntpw .deb using another computer, transfer it over via USB, and then double-click it to install it.

First we want to make sure we have the proper software sources enabled to install chntpw.
Go to System > Administration > Software Sources

Make sure both the Universe and Multiverse repositories are checked (or “ticked,” if you’re not American). Click Close and then, when prompted, click Reload.

Wait for the information about available software to reload.

Go to System > Administration > Synaptic Package Manager
(Note: to those of you who have installed software in Ubuntu before, you actually do—at least as of Ubuntu 10.04—have to go to Synaptic to install chntpw. You can’t install it through Ubuntu Software Center).

Press Control-F or click on the Search button to get the search dialogue up. Then search for chntpw.
(Note: you may be tempted to type chntpw into the search filter but it won’t show up there, since Synaptic hasn’t had time to rebuild the search index for quick filtering.)

Once chntpw pops up in the search results, right-click it and select Mark for Installation.

Click Apply, and then, when prompted, click Apply again.

Wait for the Synaptic to download and install chntpw.

To mount Windows, just click on Places and then select your drive. It will be listed by the size of the drive (in this example, 80 GB).

To open the terminal, go to Applications > Accessories > Terminal
I’m going to be offering a lot of explanation for those who aren’t experienced with the terminal and commands, but if you want to just skip over all that stuff, feel free to just pay attention to the terminal commands and ignore the explanations.
Start typing cd /media/ and then hit the Tab key, and it’ll autocomplete with the address of your mounted Windows drive.
Then type W and hit Tab again to get to either Windows (Windows 7) or WINDOWS (Windows XP). Yes, the terminal is case-sensitive, so upper- and lower-case matters!
Type S or s and hit Tab again to get System32 or system32 (again depending on whether it’s Windows 7 or Windows XP—I forget which it is for Windows Vista).
And do the same for config.
Tab completion makes things a lot simpler, so you don’t have to type every single word out. It also avoids the whole typo issue, in case you aren’t a good typist.
Once you’ve gotten to cd /media/name-of-your-windows-drive/Windows/System32/config or cd /media/name-of-your-windows-drive/WINDOWS/system32/config, hit Enter.
After you type that in, hit Enter, and you’ll see a whole bunch of terminal output, most of which you can ignore:
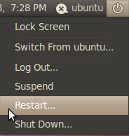
Now you can reboot, and you can log into your admin account with a blank password. Once you’re logged in, you can go to the Control Panel to change your password to something else—something you can remember.
There are many ways to get Ubuntu Linux. You can find more details about that here.
If you run into any problems or have any questions, the folks at the Ubuntu Forums are very helpful and friendly.
I will not be answering any support questions posted as comments here.
Step 1: Boot up Ubuntu
With the Ubuntu CD in your optical drive or with the Ubuntu USB plugged into your computer, make sure your BIOS is set to boot from CD or USB before your hard drive. You can usually enter your BIOS settings by pressing F1, F2, F9, F10, F12, Esc, or Del during bootup, depending on the kind of computer you have.After Ubuntu boots up, you’ll be asked if you want to try Ubuntu or install it. You definitely want to just try it at this point.
Step 2: Install the password reset software
Installing software on Ubuntu is a bit different from installing software on Windows. Instead of going to a website to download setup files, you just tell the software package manager what you want installed, and it fetches it for you off some servers. It’s a lot like the iTunes App Store or Android Market.This does assume that you have a working internet connection (wired preferred, but wireless can work, too). If, for some reason, your internet connection isn’t working on the computer you want to reset the password for, you can also download the chntpw .deb using another computer, transfer it over via USB, and then double-click it to install it.
First we want to make sure we have the proper software sources enabled to install chntpw.
Go to System > Administration > Software Sources
Make sure both the Universe and Multiverse repositories are checked (or “ticked,” if you’re not American). Click Close and then, when prompted, click Reload.
Wait for the information about available software to reload.
Go to System > Administration > Synaptic Package Manager
(Note: to those of you who have installed software in Ubuntu before, you actually do—at least as of Ubuntu 10.04—have to go to Synaptic to install chntpw. You can’t install it through Ubuntu Software Center).
Press Control-F or click on the Search button to get the search dialogue up. Then search for chntpw.
(Note: you may be tempted to type chntpw into the search filter but it won’t show up there, since Synaptic hasn’t had time to rebuild the search index for quick filtering.)
Once chntpw pops up in the search results, right-click it and select Mark for Installation.
Click Apply, and then, when prompted, click Apply again.
Wait for the Synaptic to download and install chntpw.
Step 3: Mount your Windows drive
In order for you to reset your Windows password, you have to make the Ubuntu live session know that your Windows drive is available for use. This process is called “mounting.”To mount Windows, just click on Places and then select your drive. It will be listed by the size of the drive (in this example, 80 GB).
Step 4: Reset your password
chntpw is a terminal-based (not point-and-click) application, so to use it, we’ll have to open up a command-line terminal. Don’t be intimidated. I’ll walk you through the process.To open the terminal, go to Applications > Accessories > Terminal
I’m going to be offering a lot of explanation for those who aren’t experienced with the terminal and commands, but if you want to just skip over all that stuff, feel free to just pay attention to the terminal commands and ignore the explanations.
cd /media/493D9CB55373C3DD/Windows/System32/config/
First, you’re going to cd (change directories) to the right Windows directory.Start typing cd /media/ and then hit the Tab key, and it’ll autocomplete with the address of your mounted Windows drive.
Then type W and hit Tab again to get to either Windows (Windows 7) or WINDOWS (Windows XP). Yes, the terminal is case-sensitive, so upper- and lower-case matters!
Type S or s and hit Tab again to get System32 or system32 (again depending on whether it’s Windows 7 or Windows XP—I forget which it is for Windows Vista).
And do the same for config.
Tab completion makes things a lot simpler, so you don’t have to type every single word out. It also avoids the whole typo issue, in case you aren’t a good typist.
Once you’ve gotten to cd /media/name-of-your-windows-drive/Windows/System32/config or cd /media/name-of-your-windows-drive/WINDOWS/system32/config, hit Enter.
sudo chntpw -u username SAM
You should then type in sudo chntpw -u username SAM, where username is your actual username. For example, if your username is susan, it should be sudo chntpw -u susan SAMAfter you type that in, hit Enter, and you’ll see a whole bunch of terminal output, most of which you can ignore:
chntpw version 0.99.5 070923 (decade), (c) Petter N Hagen
Hive name (from header): <\SystemRoot\System32\Config\SAM>
ROOT KEY at offset: 0×001020 * Subkey indexing type is: 666c
Page at 0×7000 is not ‘hbin’, assuming file contains garbage at end
File size 262144 [40000] bytes, containing 6 pages (+ 1 headerpage)
Used for data: 260/20240 blocks/bytes, unused: 9/4144 blocks/bytes.* SAM policy limits:
Failed logins before lockout is: 10
Minimum password length : 4
Password history count : 4
| RID -|———- Username ————| Admin? |- Lock? –|
| 01f4 | Administrator | ADMIN | dis/lock |
| 01f5 | Guest | | dis/lock |
| 03e8 | susan | ADMIN | |
———————> SYSKEY CHECK <-----------------------
SYSTEM SecureBoot : -1 -> Not Set (not installed, good!)
SAM Account\F : 0 -> off
SECURITY PolSecretEncryptionKey: -1 -> Not Set (OK if this is NT4)
Syskey not installed!
RID : 1000 [03e8]
Username: susan
fullname:
comment :
homedir :
User is member of 1 groups:
00000220 = Administrators (which has 4 members)
Account bits: 0×0214 =
[ ] Disabled | [ ] Homedir req. | [X] Passwd not req. |
[ ] Temp. duplicate | [X] Normal account | [ ] NMS account |
[ ] Domain trust ac | [ ] Wks trust act. | [ ] Srv trust act |
[X] Pwd don’t expir | [ ] Auto lockout | [ ] (unknown 0×08) |
[ ] (unknown 0×10) | [ ] (unknown 0×20) | [ ] (unknown 0×40) |
Failed login count: 0, while max tries is: 10
Total login count: 100
This part is important, though:Hive name (from header): <\SystemRoot\System32\Config\SAM>
ROOT KEY at offset: 0×001020 * Subkey indexing type is: 666c
Page at 0×7000 is not ‘hbin’, assuming file contains garbage at end
File size 262144 [40000] bytes, containing 6 pages (+ 1 headerpage)
Used for data: 260/20240 blocks/bytes, unused: 9/4144 blocks/bytes.* SAM policy limits:
Failed logins before lockout is: 10
Minimum password length : 4
Password history count : 4
| RID -|———- Username ————| Admin? |- Lock? –|
| 01f4 | Administrator | ADMIN | dis/lock |
| 01f5 | Guest | | dis/lock |
| 03e8 | susan | ADMIN | |
———————> SYSKEY CHECK <-----------------------
SYSTEM SecureBoot : -1 -> Not Set (not installed, good!)
SAM Account\F : 0 -> off
SECURITY PolSecretEncryptionKey: -1 -> Not Set (OK if this is NT4)
Syskey not installed!
RID : 1000 [03e8]
Username: susan
fullname:
comment :
homedir :
User is member of 1 groups:
00000220 = Administrators (which has 4 members)
Account bits: 0×0214 =
[ ] Disabled | [ ] Homedir req. | [X] Passwd not req. |
[ ] Temp. duplicate | [X] Normal account | [ ] NMS account |
[ ] Domain trust ac | [ ] Wks trust act. | [ ] Srv trust act |
[X] Pwd don’t expir | [ ] Auto lockout | [ ] (unknown 0×08) |
[ ] (unknown 0×10) | [ ] (unknown 0×20) | [ ] (unknown 0×40) |
Failed login count: 0, while max tries is: 10
Total login count: 100
- – - – User Edit Menu:
1 – Clear (blank) user password
2 – Edit (set new) user password (careful with this on XP or Vista)
3 – Promote user (make user an administrator)
(4 – Unlock and enable user account) [seems unlocked already]
q – Quit editing user, back to user select
Select: [q] >
I would highly recommend typing 1 to blank the password instead of editing the password. After you type that, hit Enter, and you should see1 – Clear (blank) user password
2 – Edit (set new) user password (careful with this on XP or Vista)
3 – Promote user (make user an administrator)
(4 – Unlock and enable user account) [seems unlocked already]
q – Quit editing user, back to user select
Select: [q] >
Password cleared!Hives that have changed:
# Name
0
Write hive files? (y/n) [n] :
Type y and hit Enter to confirm the change. Once you see# Name
0
Write hive files? (y/n) [n] :
0 – OK
then you’re done.Now you can reboot, and you can log into your admin account with a blank password. Once you’re logged in, you can go to the Control Panel to change your password to something else—something you can remember.